|
Rebel Fork Framework
|
A good starting point for a game would be a sample project.
You can create a new repository based on a template repository on GitHub in the following way:

Your new repository will be created with the same files and directories as the template repository, and you can start using it right away. Note that the new repository will not be connected to the template repository, and any changes made to the new repository will not affect the template repository.
Note: Not everyone is familiar with git. If you are then you already know what to do and can skip this section.
You should have the repository from the previous section avaliable in your github account. If not - you can use https://github.com/rbfx/sample-project instead.
"git clone" is a Git command that allows you to copy (or "clone") a Git repository from a remote source to your local machine. When you run the "git clone" command, Git downloads all the files, history, and metadata of the repository to your local machine, creates a new Git repository in the current directory, and sets up a remote repository (also known as a "remote") that points back to the original repository.
To clone a git repository you need a git client. Here is a list of resources where you can get a command line git client: https://git-scm.com/downloads
To get the clone URL of a GitHub repository, follow these steps:
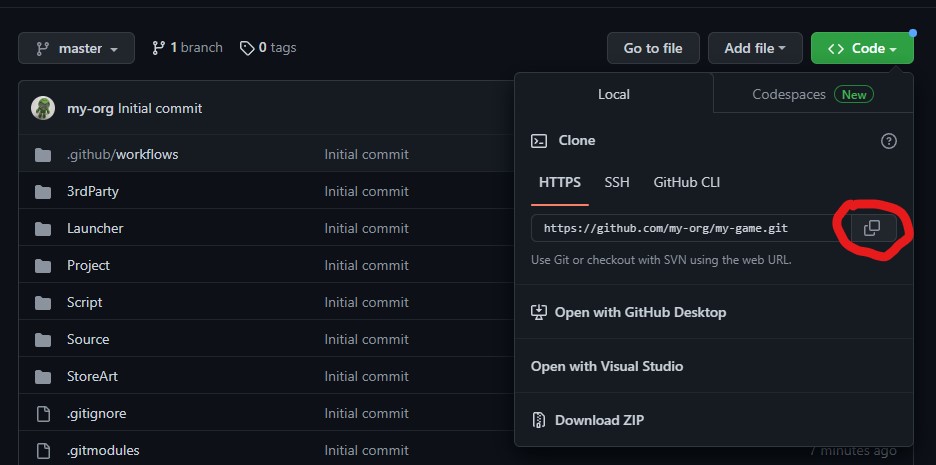
Important: Sample project references to the rbfx engine code as a submodule. "Download ZIP" won't work for you.
Don't forget to restart your console after git client installation, otherwise it may not be found in the path.
Cloning the main repository: This is done using the git clone command followed by the URL of the main repository.
Initializing and updating the submodules: After cloning the main repository, you need to initialize the submodules and update them to the latest version. To do this, you can use the git submodule init and git submodule update commands.
This will clone all the submodules in the main-repo repository. You can also specify the –recursive option while cloning the main repository to initialize and update the submodules automatically.
Note that submodules are independent Git repositories, so any changes you make to a submodule will not be reflected in the main repository until you push the changes to the submodule's repository and update the reference in the main repository.
There are multiple GUI applications for Git, some of them free.
Here is a guide for Git Extensions as an example. You can find similar options in any Git GUI application.
You can get Git Extension from the web site https://gitextensions.github.io/. Open the "Download" section and click on the latest release installer, for example GitExtensions-4.0.2.16100-25100ec1f.msi (the version may be different). It may ask you to download and install a certain version of Microsoft Windows Desktop Runtime.
When you run the application it will settings window. You can set it up later, for now you can just click "On" to open the main window.
There are two options to clone repository:

Let's take a look into generic "Clone repository" first.
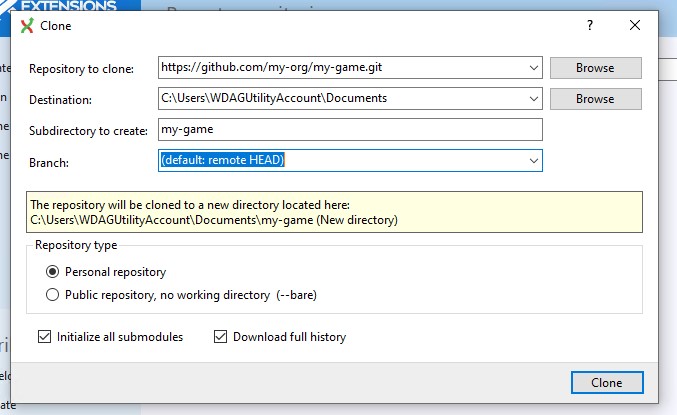
Fill in where you want to clone the game repository. "Initialize all submodules" checkbox allows you to fetch the engine source code along with the game source code.
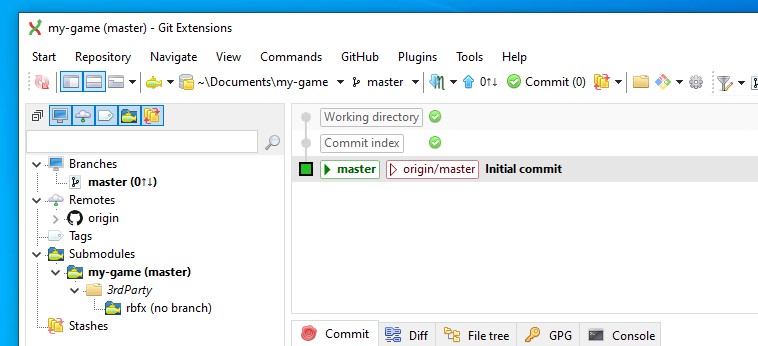
When clonned you should get an overview on your repository:
First you need to generate a GitHub token following one of the links on a setup page. The token gives the Git Extension application access to your GitHub account.

Then you should be able to see list of your repositories, including the game repository you created from the template.
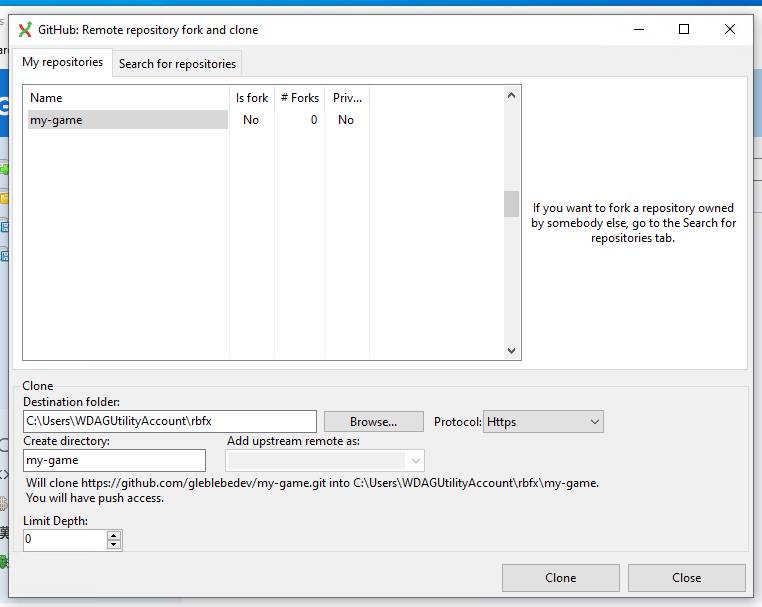
Fill in required information and click "Clone" button.
You are not done yet. The previous step only clonned the game source code but you still need the engine submodule. You need to find the rbfx submodule and click "Update" in the context menu.
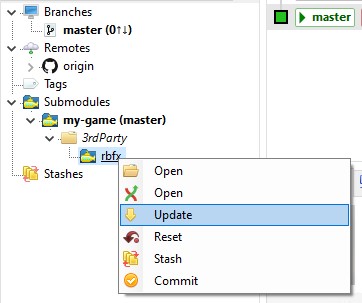
Now you are ready configure and run the game.
To build a project based on rbfx you need to configure in first.
CMake is an open-source, cross-platform build system generator. It is used to control the software compilation process using simple platform- and compiler-independent configuration files. CMake generates native build scripts that can be used in the compiler environment of your choice.
The CMake can be installed on different operating systems in different ways. Here are instructions for some common platforms:
For Windows or MacOS:
For Ubuntu:
Open a terminal window and run the following command to install CMake:
The easiest way to configure project is to run a configuration script. Pick one that suits you.
When picking a cmake configuration script file, you should consider the target CPU architecture and operating system (OS) that you are building for. The triplet name follows the pattern "configure-{architecture}-{system}-{build-system}".
Here's an example of how to pick a cmake configuration script file for a 64-bit Windows system:
So, for a 64-bit Windows system, you should use the cmake configuration script file "configure-x64-windows-vs2022.bat". You can use a similar process to pick a script name for other target CPU architectures and operating systems.
Make sure that cmake is available from the console when you run the script.
When configuration is done you'll find a new folder in the repository. The name of the folder is "cmake-build-{architecture}-{system}".
When using the Visual Studio generator, CMake will generate a Visual Studio solution file (.sln) and project files (.vcxproj) for each target in your CMake project. The .sln file is the top-level solution file for your project, and it contains one or more projects. Each .vcxproj file is a project file for a specific target in your project.
When using the Ninja generator with CMake, CMake will generate build files that can be used by the Ninja build system. Specifically, CMake will generate a build.ninja file that describes the build rules and dependencies for your project, as well as any other files needed by the Ninja build system to build your project.
Once the project is configured, you can use the build system to build the project. This can be done using the cmake –build command. For example, to build the project using selected build system, you would run the following command:
This assumes that you are still in the "cmake-build-{architecture}-{system}" directory. The –build option tells CMake to build the project, and the . specifies the current directory as the location of the build files.
Among the targets generated by CMake you can find one that combines project name (for instance "SampleProject") with "Launcher" suffix. This is the main executable for the game.
**...To be continued...**