Setting up Editor
The Editor can process assets in .glb or .gltf file formats by default. However, you can also import .blend files or .fbx files with a few extra steps.
To import .blend files or .fbx files, you need to define the path to Blender and/or FBX2glTF executables in the Settings window. Here’s how you can do it:
- Open the main menu and select Window > Settings.
- In the Settings window, you can define the path to Blender and/or FBX2glTF executables.

- Once you have defined the path to the executables, the Editor will be able to import .blend files or .fbx files accordingly.
Defining Asset Pipeline
The process of importing assets is controlled by a file with the extension .assetpipeline. Although you can have multiple files, only one file will be used by the editor. Therefore, it is recommended to use only one file to avoid confusion.
The .assetpipeline file defines how assets are processed during import. It specifies the rules and settings that the editor uses to import assets. By modifying the .assetpipeline file, you can customize the import process to suit your needs.

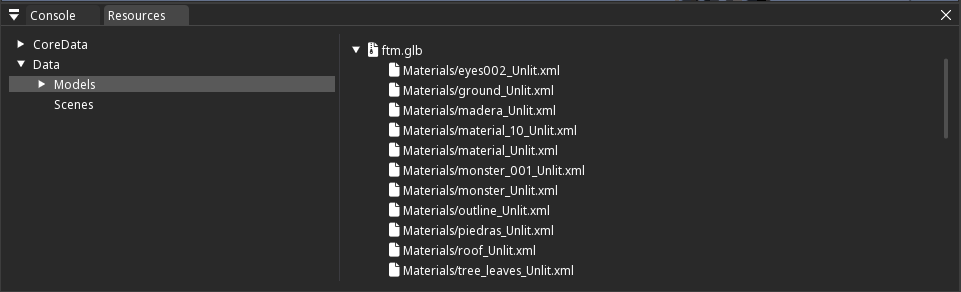
Once you have set up your .assetworkflow file, you can add assets by copying them into the Data folder. The Editor should automatically detect new files and run the asset pipeline import process. However, if it doesn’t happen automatically, you can force an asset scan by clicking on the "Update Assets" button in the asset pipeline inspector.
After the import process is complete, the generated files are stored in the Cache folder. You can access the imported assets in the Resources tab under the imported asset tree, as shown in the following screenshot:
Coordinate System Conversion between Blender and Engine
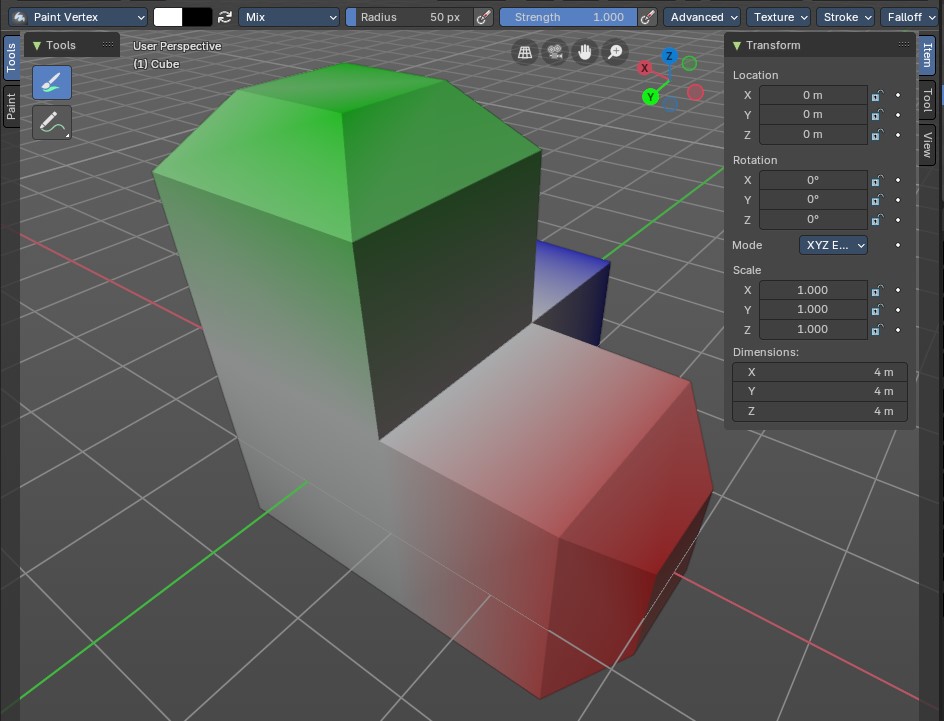
Blender and the engine use different coordinate systems. In Blender, the Z-axis represents the up direction, whereas in the engine, the Y-axis is used as the up direction. When processing assets from .blend files, everything will be rotated by 180 degrees when placed in the engine:


To avoid this, you can model everything taking into account coordinate system transformation.
Axis Conversion
Blender’s Coordinate System:
- Z-axis: Up
- Y-axis: Forward
- X-axis: Right
Engine's Coordinate System:
- Y-axis: Up
- Z-axis: Forward
- X-axis: Right
To convert coordinates from Blender to the engine, you need to remap the axes as follows:
- Blender’s Z-axis (Up) becomes engine’s Y-axis (Up).
- Blender’s X-axis (Right) becomes engine’s negative X-axis (Left).
- Blender’s Y-axis (Forward) becomes engine’s negative Z-axis (Backward).
So if you model in Blender taking into account axis conversion:
The result will naturally fit engine's coordinate system.
